
At our home, bread is consumed quickly. I mean quickly.
In our household, though, we (a.k.a. Levi) are bread purists. If it's white, square, and pre-sliced then it might as well be a poisonous snake. It just might be OK if it's made from 100% whole grain, but even then it's much less preferable to fresh-made bakery bread.
Each household usually finds its favorite bread and sticks to it. Ours happens to be the French bread loaves from our local grocery store. They come in packages of two loaves, each a foot long. These loaves are soft and chewy, make excellent sandwiches, and mop up leftover juices from meals nicely.
It would stand to reason then, in our home baking experiments, that we would strive to find the perfect French bread recipe, so we can make our own.
Well, I stumbled upon an excellent recipe, and I'm here to first tell you that it's not my recipe. This recipe is found HERE on an excellent site called Deals to Meals by Shandra Madsen, and I really like it!
*For example, I just now went to it to add the link on this blog post and found a recipe for Orange Cranberry White Chocolate Zucchini Bread. WHAT?! First, I adore zucchini bread, and second, I know the hubs does too, and third, we both like those extra flavors. BOOM. Pinned and ready to make soon.
Anyway, back to French bread! If you are an expert bread maker and simply want the recipe, just head over to Shandra's site! However, if you want lots of pictures, or the small things I encountered on my second go-around with this recipe, or documentation of more than one mistake (whoops!) then stay here and check it out!
French Bread (yields 3 smaller loaves or two large loaves)
Ingredients:
2 1/2 c. water
2 Tbs. yeast
3 Tbs. sugar
2 Tbs. white vinegar
1 Tbs. salt
1/3 c. oil (we use Canola)
7 c. flour (could take slightly more or less, depending on elevation)
1/2 c. corn meal
1 egg
Tools:
stand mixer with bread hook
Directions:
1. Add the water, yeast, sugar, and vinegar to the mixing bowl. Whisk it together and let it sit for about 5 minutes until it gets bubbly.
2. Then add the salt and oil. Add the flour one cup at a time while mixing on low. Keep adding flour until the dough is still soft yet firm enough to mold into dough loaves.
3. Take the dough out of the mixer and knead it for about 5 minutes on a floured board. Then place it in a bowl and put it on the top rack inside your oven (oven remains off). Add a small pot of boiling water beside it or on the bottom rack. This keeps the dough moist and encourages rising.
4. Watch the dough and punch it down (yes, literally, but very gently) once it has doubled in size. This takes anywhere from half an hour to an hour depending on how much flour you put in your dough. Let the dough re-rise anywhere from 2 to 5 times (as long as you have to babysit it).
5. After the last time, place the dough on a greased countertop and divide into 2-3 sections. Grease a cooking sheet and spread the corn meal in a thin layer on the sheet. It might take 2 sheets if you make 3 loaves. Roll the loaves into long French bread shapes and place on the sheets.
6. Slash the tops of the bread diagonally. Beat the egg and then brush the tops of the loaves with the egg. This produces the lovely chewy texture and shiny look that French bread has.
7. Let the dough rise on the counter until doubled in size, and then bake at 375 degrees for about 35 minutes. Serve warm out of the oven!
---
Now, here are the pictures of my process yesterday, and some hints and tips for the things I learned, reminders of things to make sure you don't forget, and the mistakes I made that you'll want to be sure you don't repeat!
 |
| Initial ingredients, plus flour. |
 |
| Frothy and ready for the oil, salt, and flour. |
 |
| In goes the oil and the salt. Now we're ready for the flour! |
 |
| I put the first two cups of flour in before turning on the mixer so it would have something to work with. |
*And here I had a few videos of the mixing process, but something's not working correctly today, so you'll just have to imagine that part. It was exciting, let me tell you.
 |
| Mixing, action shot! |
 |
| Finished mixing at 6 1/2 cups of flour. This sticky texture is OK, and don't worry because... |
 |
| I floured my board with the remaining 1/2 cup of flour that I wanted to go in the dough. |
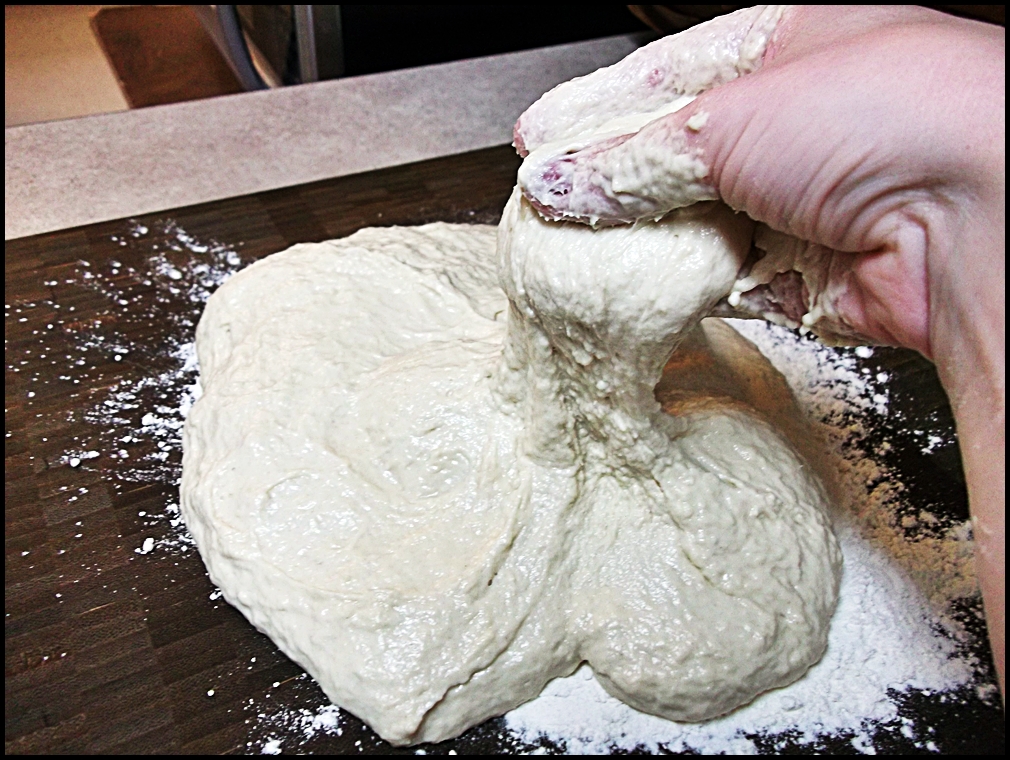 |
| Then I began to mix and knead it by hand. Don't be scared! It'll be OK! You can always add more flour, but you can never take it away if you use too much! Just be prepared: your hands WILL get crazy messy. |
 |
| I ended up adding about another 1/4 cup of flour, giving me a grand total of 7 1/4 cups in this bread. And these are my hands afterwards. I wanted the dough to be this sticky on purpose because I wanted it to rise very easily. For this bread, the more air in it, the better! Also, never put hands like this under water in the sink. Use the excess flour on the board to sort of scrub off the dough from your fingers, then throw that away. This stuff can clog up your pipes if you just wash your hands! |
 |
| Dough goes in the (off) oven. |
 |
| Boil your pot of water. |
 |
| Put the boiling water in the oven with your dough. It will stay nice and moist AND it will rise very quickly, allowing you more times to punch it down. |
 |
| I punched my dough 5 times over the course of three hours. This was the prettiest rise! |
 |
| Add a thin layer of corn meal on your baking surfaces. I used my pizza stone as one and my baking sheets as another. I wanted to see which would produce a better loaf of bread. Without a doubt, the stone made a better loaf. I highly recommend you use your (non-glazed) stoneware if you have it! |
 |
| I also experiemented with wetness. The loaf on the left simply came out of the bowl and was placed on the baking sheet after I (tried to) shape it. The loaf on the right was given a super quick knead in some flour just so it would hold its shape. Despite its ugly shape, the one on the left had lots of fluffy air bubbles after it baked, but the one on the right didn't (which is to be expected if you add more flour). But the one on the right didn't need to be as dense as it was because... |
*I forgot a crucial step here! I forgot to let my loaves rise after I put the egg wash on! So don't forget to let them rise one last time! Whoops!
 |
| And, of course, don't forget the egg wash! The loaves are gorgeous and tasty with it! |
 |
| The loaf just before I put it in the oven. If only I'd let it rise again! It was still super soft, chewy, and delicious, but it could have had more air pockets inside if I'd let it rise again. And I really like air pockets in my French bread! |
 |
| The finished product. Well, at least the pretty one! Look how gorgeous that egg wash makes it! |
 |
| So tasty! |
 |
| My last mistake: thinking I could bake without making a terrible mess. Mrs. Clumsy over here flipped her bread loaves onto the oven door, along with all of the corn meal. I had to leave the oven door open to cool until I could vacuum up the mess. It went everywhere! Oops. |
I was super intimidated by this recipe when I first came across it, but thankfully my desire to make homemade French bread for my husband propelled me into it. It's actually really easy to make, and it doesn't have to take that long, especially if you only let it rise twice instead of six times.
Try it out! It's always better than store-bought bread because people will "ooo" and "ahh" over homemade bread, your loved ones will feel extra loved that you took the time to do this, and you'll feel like a total BA for accomplishing something like this!
Happy baking!

Love the pictures! Looks delicious.
ReplyDelete