Showing posts with label healthy. Show all posts

Thursday, February 26, 2015

Recipe: Museli

Our standard breakfast around here is a bowl of plain yogurt (and full-fat is the only real yogurt in existence, don't even talk to me about low-fat or *shudder* fat-free) with a scoop of granola. If I'm feeling extra extravagant I'll throw some fresh or frozen berries on the top and drizzle some honey over all of it.

The only problem with this scenario is that store-bought granola is packed full of sugar. Like, a lot of sugar. An option for us might be making our own granola, which we've done before and we enjoy. The problem with that is the time required (a rather long baking time and heavy monitoring required with stirring throughout). Also, the sugar in that is still pretty high. 

Enter, our newest (and most delicious) solution. 

Tuesday, September 11, 2012

Recipe: Peppers and Onions with Chickpeas

This last weekend Levi and I took an impromptu trip to the big city for some fun, relaxation, and entertainment. We had a great time and we ate some great food (including my favorite: sushi!), but at the same time, that great food we ate counted as eating out. And as anyone who cooks at home every night knows, eating out for a few days leaves a stomach feeling overly full, clogged, and a bit icky.

So when we got home on Sunday evening we really wanted something light that used only whole foods. We had some chickpeas left over from a curry dish I'd prepared the previous week, so we started with that. After rummaging around in our fridge and using some fresh produce a coworker gave us (always take advantage of those!), this is what we came up with:

Peppers and Onions with Chickpeas

Ingredients
2 c. cooked chickpeas
1 green pepper, roughly chopped
1 large tomato, chopped
1 large onion, roughly chopped
1 jalapeno pepper, diced
1 garlic clove, diced
1 tbs. oil
1/2 tbs. basil

Directions

1. Heat the oil in a large skillet over medium heat. Once hot, toss in the onions. Saute for about 2 minutes. Add the garlic and peppers and saute for about 5 minutes, or until pepper begin to soften.

2. Add the chickpeas and saute, uncovered, for about 10 minutes, or until the mixture is as browned as you'd like. The more you let the mixture brown, the crispier and warmer it will taste.

*Hint: If you want that crispy and warm flavor like we do, you have to do the hardest thing in cooking: leave the pan alone! The more you move the food around, the less it will brown. Trust the pan, and let it sit for at least 30 sec. between tosses. It's harder than it sounds!

3. Once you've achieved the browned quality you desire, add the tomato and the basil. Fresh basil would be best, but dried is also fine. Saute this for about 2 minutes, or just until the tomato is hot. Salt and pepper to taste, then serve with bread or rice or the grain of your choice.

*Hint: This dish works best without the juice from the tomato. Once you've quartered the tomato, run the pieces under cold water and scrape out the juice and the seeds. Then you're left with just the delicious flesh of the tomato.

----

This dish was just thrown together, but it turned out to be a wonderful, spicy, and light meal for two. Also, I had it for lunch the next day and I added a fried egg to the top. So good!

Here are the pictures of our process!

Our chickpeas that we boiled ourselves days before. Canned chickpeas would work well, too.
Rough chop the onion.
Dice the garlic.
We used a green bell pepper, but if you want it to feel warmer, try a red bell pepper.
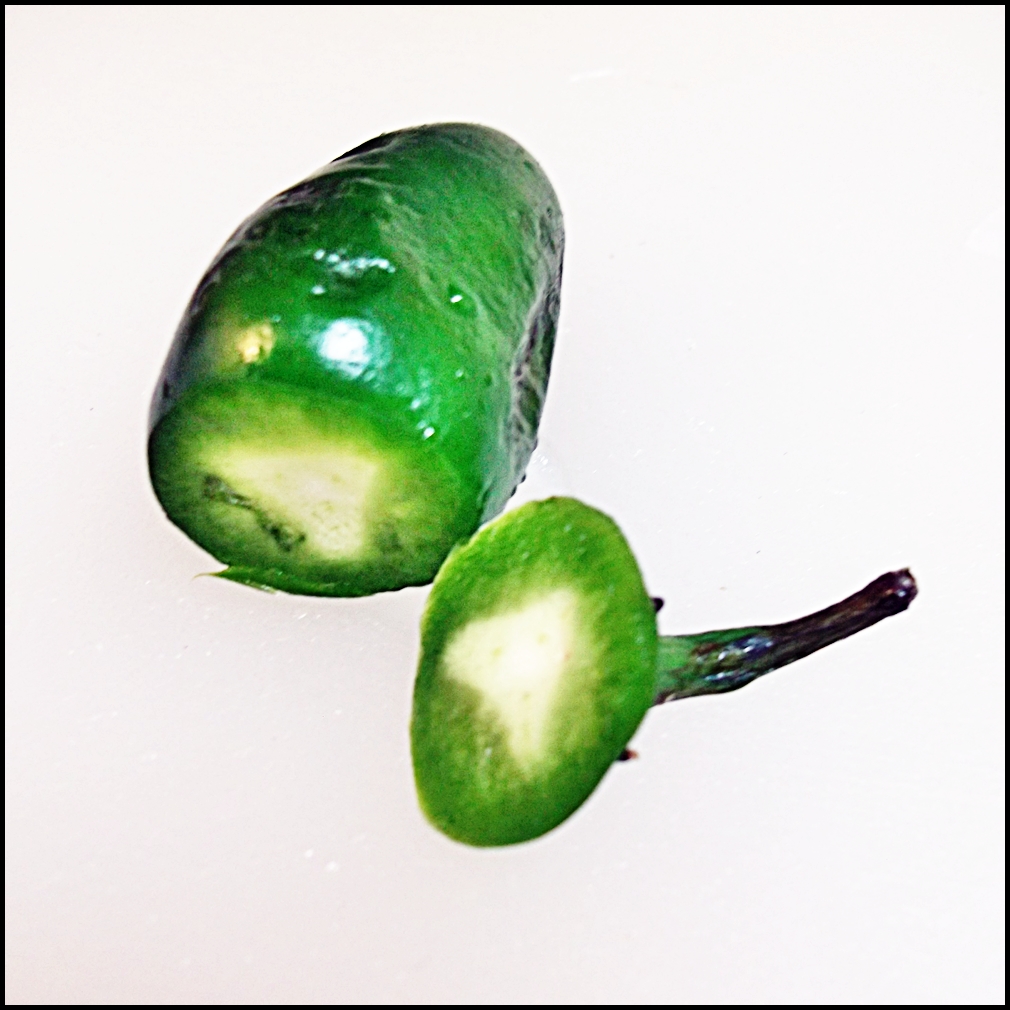
One jalapeno was enough for us! Add more if you dare...
Garden tomato from a coworker. Working with lots of gardeners has its perks!
Saute the onions, garlic, and peppers.
Add the chickpeas and let it start to brown. We seasoned ours with salt and pepper at this point.
It will be hard, but you have to leave it alone! Get that delicious browned flavor!
Once it's browned to your desired point, add the tomato chunks. Levi likes it like this, but I probably could have seared the mixture even more! Bring on the brown!
Get yourself some basil onto it! Right now we only have dried basil, but someday soon, by gollly, we'll have fresh basil...
Our finished dish. Doesn't that look healthy, fresh, and delish?!
We ate ours with some homemade naan bread. The recipe for that should be up here someday!
Our condiment of choice, and Levi's favorite dessert! Don't add this if you want a vegan meal, naturally.

Tuesday, August 21, 2012

Recipe: Frozen Yogurt

Ice cream. Ok, I know this post is called "frozen yogurt," but first let's start with ice cream, shall we, dear reader?

I love ice cream, but ice cream  hates me. Strong language, I know, but these are strong feelings. This love/hate relationship goes a little something like this:

1. I buy some ice cream because I love it so very much.
2. I eat said ice cream, and I feel happy, happy, happy!
3. About 15 minutes later the ice cream decides to start punishing my tummy.
4. Pain, regret, vowing I'm-never-eating-ice-cream-again, looking in the freezer, longing...

Vicious cycle, I tell you.

Frozen yogurt, however, is so much nicer to me. Since yogurt is much gentler on the digestive tract of those who are lactose intolerant, if you suffer like me in similar ways then this is the recipe for you!

Ingredients
4 c. plain yogurt (basically 1 large tub)
3 c. frozen berries
1/4 c. honey

Tools
blender
freezer-safe covered bowl

Directions

1. My first step is to thicken up my yogurt because the juice from the berries will add more than enough moisture, and I want a thicker and richer frozen yogurt. If you need to know how to thicken up your yogurt, see my yogurt cheese recipe. I simply leave out any flavoring, and I just let it drip naturally for about an hour.

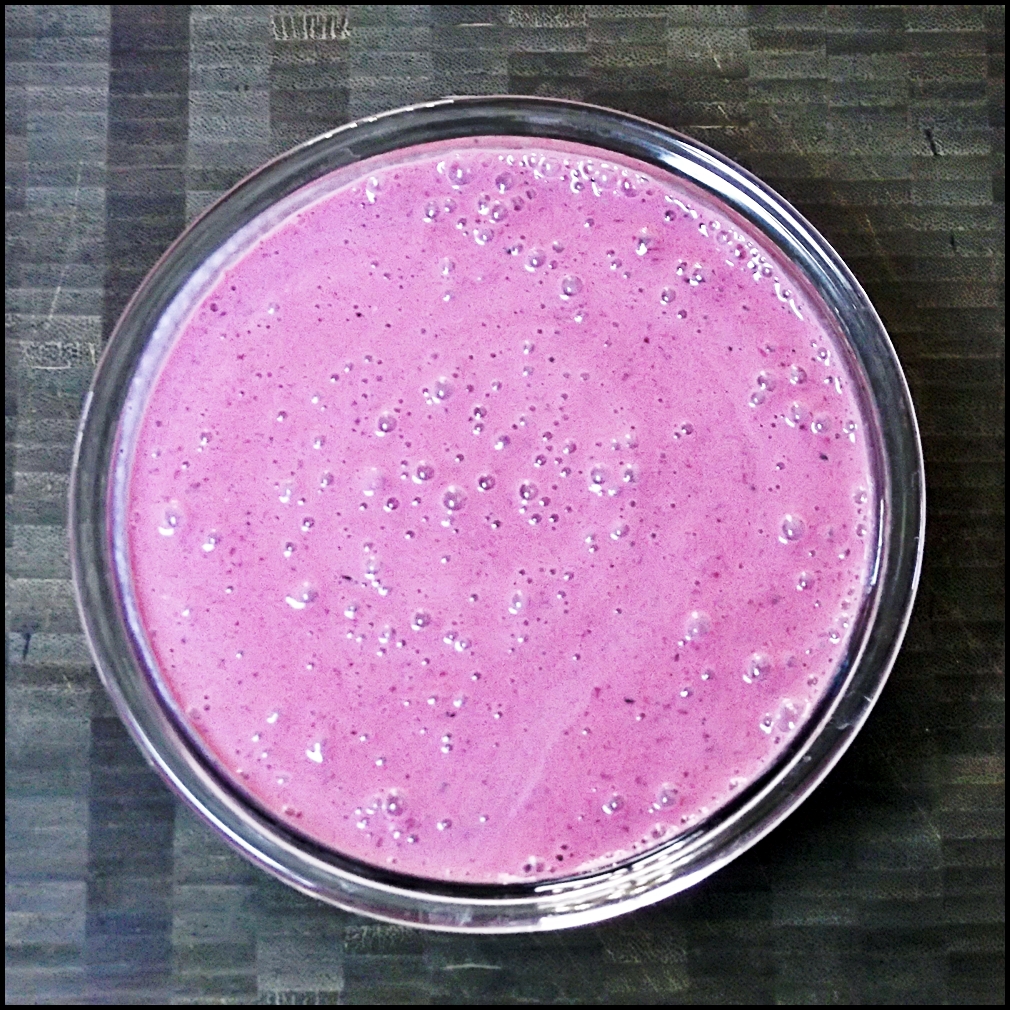
2. Once your yogurt is ready, put it in the blender. Then add your berries and the honey. Blend it until the entire mixture is smooth.

3. Pour the mixture in a freezer-safe bowl and freeze to your desired consistency.

-

I just adore simple recipes, don't you? I mean, look at that! Just three steps! Here's the process I went through when I made mine this morning.

Thickened yogurt, ready to blend.
I found that the frozen berries made the honey harder to blend, so it might be easier next time to thaw them a bit.

Can't wait to have this tonight with the hubs!

Hope you enjoy yours as much as we'll enjoy ours!

Monday, August 20, 2012

Recipe: Yogurt Cheese

Hello, faithful readers! I'm back and ready to give you our recipe and technique for making yogurt cheese. Honestly, it's such a simple process that you'll be able to adapt it to your own needs quickly and easily!

So, without further ado, let's get to the recipe!

Ingredients
1 c. plain yogurt
4 tbs. sun dried tomato pesto
1 tsp. salt

Tools
strainer or colander
coffee filters or cheesecloth
bowl to catch the whey

Directions

1. Mix the yogurt. In a small bowl, mix your yogurt with the pesto sauce and the salt.

2. Set up your drainage bowl. Hang the strainer over the bowl and line it with 2-3 coffee filters or a layer of cheesecloth.

3. Pour the mixture into the strainer. If you're using cheesecloth, close the mixture up with a rubber band or twist tie. If using filters, layer 2-3 more filters over the top so the yogurt is closed off to the air.

4. Monitor the whey removal. After just 5 minutes you'll have almost a tbs. of whey out of your yogurt. After an hour you can begin to add bowls or other weighted items to the yogurt to encourage more whey removal.

5. Remove from filters/cheesecloth when desired consistency is reached. There really is no time limit, but I'd say that you won't get a good consistency unless you do one of two things: either let it drip normally overnight, or press it with increasing weight for at least two hours. You'll be amazed how much whey you can remove!

*Some people I know actually hang the cheesecloth over a bowl and let gravity do the work, but it's hard to keep it refrigerated that way if that is a concern to you.

Here's what our process looks like:

We actually use so much of our jarred pesto that we had run out! I had to improvise for ours, so I added about a tbs. of tomato paste, some basil, and some rosemary!
I had just finished pouring in the yogurt and you can already see the shimmer of dripping whey at the bottom of the bowl!
The wetness of the yogurt is apparent immediately!
The amount of whey in the bowl after just 5 minutes!
I use a heavy ceramic bowl as an initial weight, and then this allows me to add more weight to encourage more drainage.
This is the texture after only 2 hours of weighted straining.
Our finished yogurt cheese. This yields just over half a cup and it's delicious!
I hope that your own yogurt cheese adventures go well! This makes an amazing addition to sandwiches or bagels. We'll never need to buy cream cheese again except for really, really specific recipes!

Also, now that you've seen how easy it is, I'm sure you can imagine a hundred different ways to switch it up. Try adding only herbs and salt! Try adding some fruit and honey for something sweet! Try adding cinnamon, cloves, or nutmeg (or all of the above, yum) for something warm! Try adding some jalapenos for something spicy!

The sky's the limit.

Enjoy!

Tuesday, August 14, 2012

Yogurt: The Super Food

Yogurt. This is probably the staple in the Gibson home. We always have at least two tubs of it handy--usually plain and vanilla. And once I explain to you our own yogurt-making process, you'll understand why!

So. Like the rest of America, a number of you have probably heard about how cool Greek yogurt is, and how everyone is going nuts for it. Perhaps you yourself go nuts for it! Now, I can easily understand this. It's thicker, richer, tastier, and healthier for you than regular ol' yogurt.

The cool part, though, is once you understand why it has its benefits and how those are achieved by those who manufacture Greek yogurt, you'll not only be able to make your own Greek yogurt, but you'll also be able to take it a step further into what the mister and I affectionately call "yogurt cheese."

So, strap yourselves in, gentle readers! The rest of this week is devoted to yogurt! On Wednesday I'll show you how to make your very own "Greek" yogurt. On Thursday I'll show you how to make two different kinds of yogurt cheese. And on Friday I'll show you how to make a much healthier, delicious frozen yogurt.

That means today, Tuesday, is the day for knowledge and education about this Super Food!


General Benefits of Yogurt

1. Calcium + vitamin D = Good for bone health!
2. Active cultures = Good for the gut!
3. Active cultures = Good for "lady parts" health!
4. Incredible recipe substitute
5. Easier on the tummy than milk
6. Great source of protein (when plain)

*Read more about those benefits here.

Greek Yogurt

Greek yogurt, in its essence, is yogurt that has had the whey strained and pressed out of it. Since whey is the liquid part of milk, pressing this out is what makes Greek yogurt thicker and creamier. Also, whey contains lactose, so this makes Greek yogurt even easier on a tummy that is lactose intolerant (like mine).

Also, since plain yogurt can have up to 20% of your daily value of protein, pressing the whey out of yogurt means that you'll have roughly twice as much protein in a spoonful of Greek yogurt. Awesome!

One small downside is that by removing the whey, you're also removing some of the calcium, so just be aware of that if what you're going for is calcium. But if you're going for protein, then carry on!

*Read more about Greek yogurt and its production here.

Just be Careful of...

1. Sugar content. Most low fat yogurts out there add tons of extra sugar when they take the fat out. Seriously. If you want to see for yourself how bad it is, the next time you're standing in front of that massive yogurt wall at the grocery store, pick up a tub of regular fat, low far, and light yogurt. Make sure it's the same brand, and then compare them all.

2. Vitamins. When you're comparing, also check out how vitamins and nutrients suffer in the light versions. Some brands are better at it than others, so although you might pay more for a vitamin-rich light yogurt, your body will benefit, and isn't that what matters most?

3. Active cultures. If you're interested in yogurt because you want to help your digestion or your feminine health, then check the label again to make sure it has active cultures! Make sure it has a little graphic that says "live and active cultures."

4. Labels. Ok, so I know I just told you to check labels, but here I mean things labeled as "yogurt-covered" or made with "frozen yogurt." Things that are dipped or covered in yogurt are often dipped in yogurt that has so much added sugar that you might as well schedule that cavity filling now. And frozen yogurt has so much added stuff, including our favorite adversary--sugar, that making your own is well worth the effort.

*Read about health and diet information here.
*Read about some more health information here.

All This to Say...

I hope you're learned some cool benefits of yogurt (or felt yourself validated because you're already aware of this Super Food), and that you're excited to learn how much it can be incorporated into recipes and daily life.

We are most definitely fans, and you'll start to notice it as the blog continues!

Monday, August 13, 2012

Recipe: Lentil Loaf

Ok, show of hands. How many of you have heard of lentils? How many of you know what they are? How many of you have actually had lentils? And, finally, how many of you have had them and enjoyed them?

If there aren't that many people left raising their hands, I understand. I must admit, I would have been one of the ones whose hand would have gone down at the "enjoyed" question. But then a few weeks ago a friend posted a picture of her lentil loaf dinner, and my brain went "!!!".

Levi and I have really been working on making lentils a staple of our diet because of their crazy awesome benefits--and the list I'm about to post comes from the Holy Grail of information sites: Wikipedia, but never, ever, tell my former students that!


Lentils are:

1. Chock-full of protein (30% of their calories are from protein)
2. Inexpensive
3. High in iron
4. Low in sodium
5. High in dietary fiber
6. Listed as one of the five healthiest foods
7. Crazy tasty!

Now that I've convinced you about the Wonder Food, the Lentil, using my scholarly research, let's get to the recipe for lentil loaf, which is now our favorite dish.

Well, top three at least!


Lentil Loaf

Ingredients:

Loaf:
1 c. dry lentils
3 c. chicken or vegetable stock
1 tbs. rosemary
1 egg or 1 flax egg (3 tbs. ground flax seed mixed with 1/2 c. warm water)
1 tbs. olive oil
3 garlic cloves, minced
2 onions, diced
1/2 c. green onion, diced
2 carrots, finely grated
1 apple, peeled, cored, and diced
1/4 c. raisins
1 c. bread crumbs

Glaze:
2 tbs. ketchup
1 tbs. balsamic vinegar
1 tbs. maple syrup
*Don't skip the glaze! It's well worth it!

Directions:

1. Cook the lentils. Rinse the lentils under cold water thoroughly. Pick out any small pebbles or gritty items that might be in them. Add the chicken or vegetable stock to a medium pot and bring to a boil. Add the dry lentils and the rosemary. Add salt and pepper to taste. Bring those to a boil and then simmer, covered, until the lentils are tender, stirring frequently. This takes about 40 minutes. Once cooked, remove from the burner and set aside to cool.


*Side note: These cooked lentils were so good that we'd eat them plain like this! So if you don't want to go all the way to lentil loaf, just cook these, scoop them on top of some brown rice, and you've got an incredibly healthy and savory (and cheap!) meal.

2. Preheat the oil. Preheat the oven to 350 degrees F.


3. Prepare the veggie mix. While your lentils are cooking, dice and grate your vegetables and apple. Once these are ready, in a large skillet over medium heat, saute onion and minced garlic for about 5 minutes. Once the onions are tender, add the carrot and saute for 2-3 more minutes. Add the apple and raisins and saute for another 2 minutes. Add salt and pepper to taste, remove from the heat, and set aside.


4. Process 75% of lentils (optional). If you want a loaf with a smoother texture which holds its shape, you can do this step. Once the lentils are cooled, take 75% of the lentils and place in the food processor. Process them until they are mostly smooth and then add them back to the rest of the lentils. Personally, Levi and I like the chunky texture when we leave the lentils whole, and we don't mind if it crumbles a little bit!

5. Mix it up! To the lentils, add the egg, breadcrumbs, and veggie mixture. Stir well with a spoon. Mash it together with your fingers if you want! I, personally, love doing this. Taste and adjust the seasons as necessary, but I wouldn't recommend this if you're using a real egg!


6. Press into a loaf pan. Dump the mixture into a loaf pan (spray with cooking spray or coat with parchment paper) and press it firmly down. My tool of choice? A rinsed shopping bag! Using this, I can push as firmly as I want without any of the delicious mixture sticking to my hands, and I can smooth it down to remove fingerprints.


7. Prepare glaze. In a small bowl whisk together all glaze ingredients. Spread evenly over the top of the loaf.


8. Bake. Bake the loaf, uncovered, for 45 minutes at 350 degrees F.

Cool for about 10 minutes, serve, and enjoy!

*Adapted from the recipe found at Oh, She Glows.

Friday, August 10, 2012

Recipe: Hummus

The first staple in the Gibson home is hummus. Now, here's the thing about hummus. It's always amazing at most Mediterranean restaurants, but then when you try to buy it at the grocery store it tastes oily, flat, and just a little, well, wrong.

We're here to tell you that it's because the less you put into it, the better, and the fewer preservatives that get added into it, well, that's good!

As long as you have some patience and a food processor, hummus is actually really easy and pretty cheap to make. So here's the recipe for you.


Hummus

Ingredients:

-- 1 lb. garbanzo beans
-- 2 tsp. baking soda
-- 4 garlic cloves, crushed
-- 1/2 c. tahini sauce
-- 1/3 tsp. salt
-- 2-3 lemons

Directions:

1. The night before you make the hummus, soak the garbanzo beans in 1 tsp. of baking soda. Levi and I learned through trial and error that adding baking soda is essential! It helps soften the beans significantly, which is crucial if you want that smooth, creamy texture that makes hummus so yummy.

2. When ready to prepare the hummus, drain the soaking water and rinse the beans thoroughly in cold water. Add the garbanzo beans to a stock pot with the other tsp. of baking soda add 6 c. of water (or until the beans are covered in half an inch of water). Bring the beans to a boil on high, then simmer on low for about an hour.


3. Skim off the white foam that appears in the surface of the water and dispose of it. Check the beans approximately 45 minutes into simmering to see if they are done. You can tell they are done when they mash easily between your fingers.

4. Once the beans are done, transfer them immediately to a food processor and save 1 1/2 c. of the cooking water. Add 1 c. of the water and begin grinding the beans. Add more water if needed and stop once the beans reach a creamy texture--not a thick paste, but also not like soup.

5. Add the salt and the garlic, then add the tahini sauce as the processor grinds away. After this your hummus will taste amazing, and it will be tempting to stop there!

6. Juice your lemons and add that to the hummus. Fresh lemon juice is, of course, better, and the amount of lemon juice is completely up to you. Levi and I like it to be more "lemony," so we use the juice from three, large lemons. Two lemons should be fine for most people!


7. Once the lemon juice is blended in, serve the hummus hot and fresh. We like to top ours with capers, paprika, and--occasionally--red onions, and we like to eat it with fresh veggies. You can also top yours with some nice olive oil if you'd like, and it's also delicious with pita bread and pita chips. It's also a pretty good (and healthy!) spread on sandwiches. And, as you can see, I like especially like using capers because it allows us to use our super cool tiny forks!


Note: This usually makes quite a bit of hummus, so we freeze half and slowly work through the other half. Depending on how often you'll eat it or how many people are eating it, the hummus could last through one huge get together or one month!